Let’s say you have Salesforce org and Google Calendar account. And you want events that are created on Salesforce side to be synchronized to Google Calendar account. To accomplish this we will use OAuth 2.0 authorization framework with “Authorization Code” flow (aka Web Server flow). So, let’s get started.
GitHub reference: https://github.com/volodymyrbervetskyy/sf_to_google_calendar_integration.
If you prefer videos over articles, you can check for the same tutorial on my YouTube channel: https://www.youtube.com/watch?v=qOyKk-2FV1o.
1. Setup Google Calendar API
First of all, you need to login to Google Cloud Console account and create a new project.
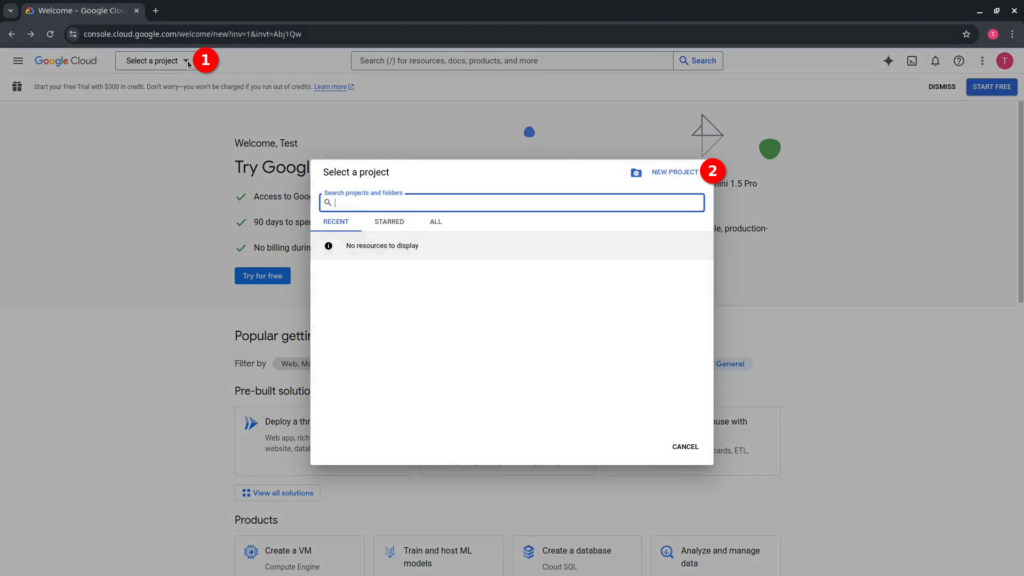
After you created the project, selected it and go to “API and Services”, then “Library”.
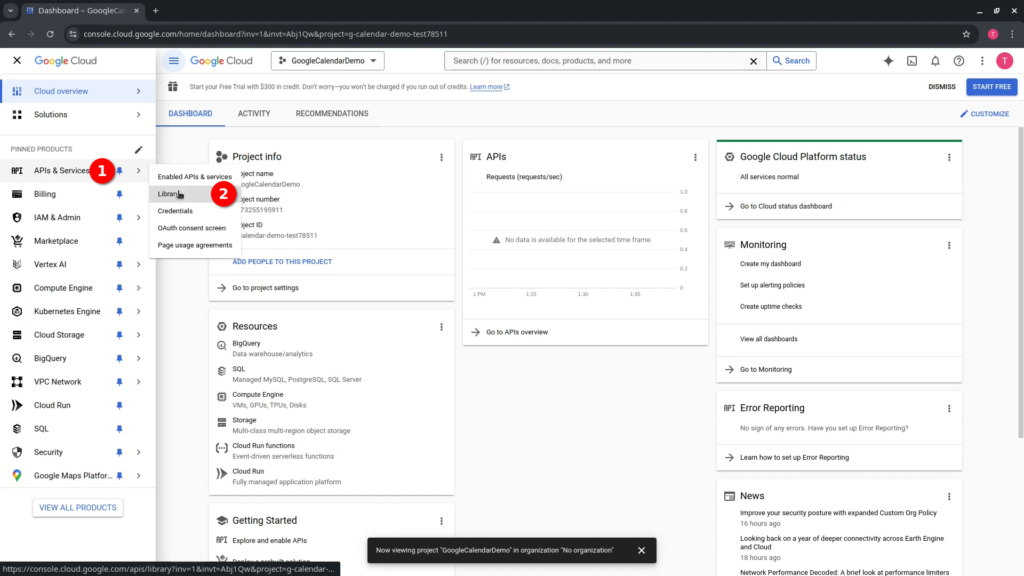
Search for “Google Calendar API”. Press “Enable” button.
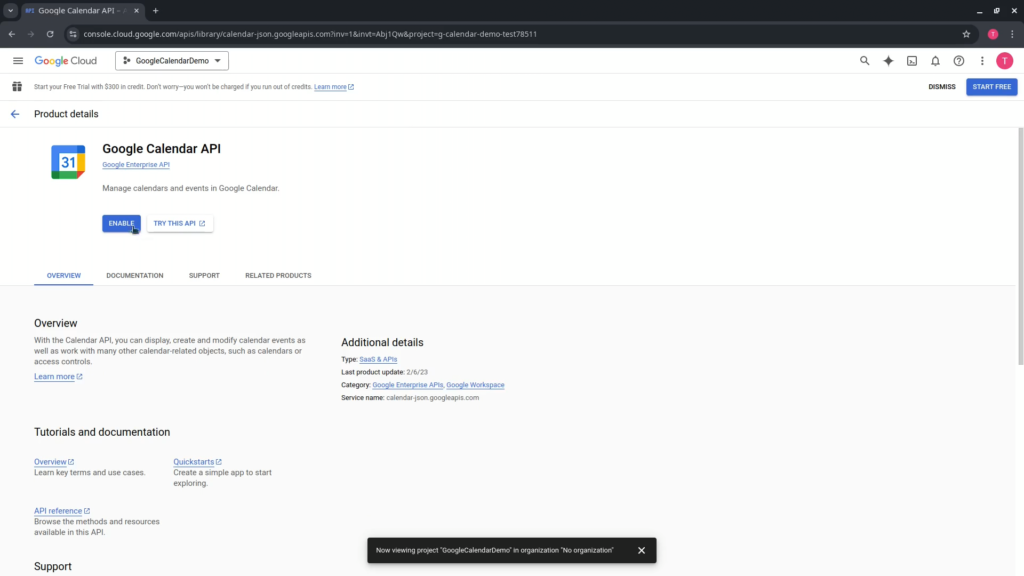
On the right hand side you can find a “Documentation” section that provides useful references.
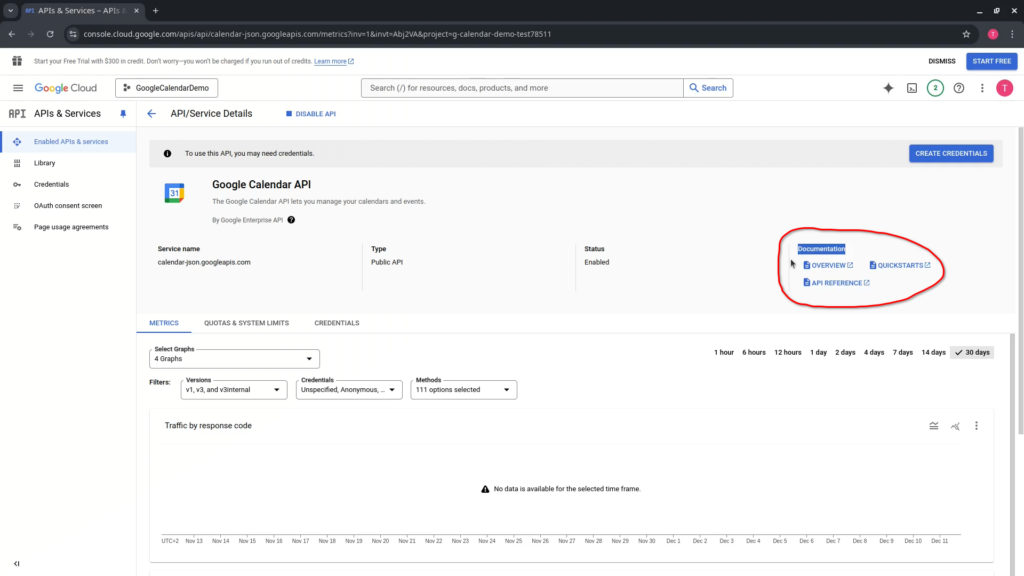
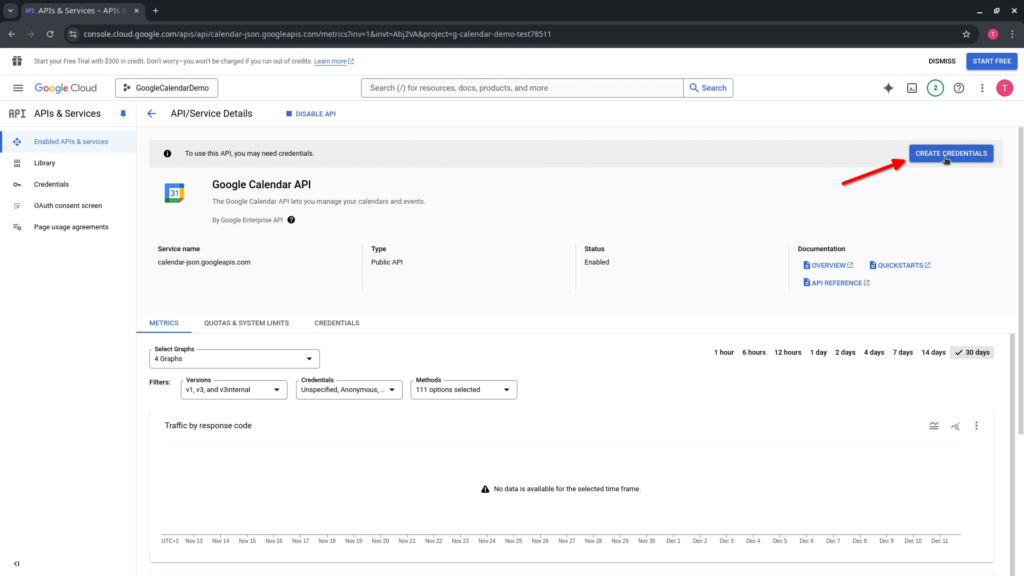
As a next step, we need to create credentials to be able to make requests to Google Calendar API from external system.
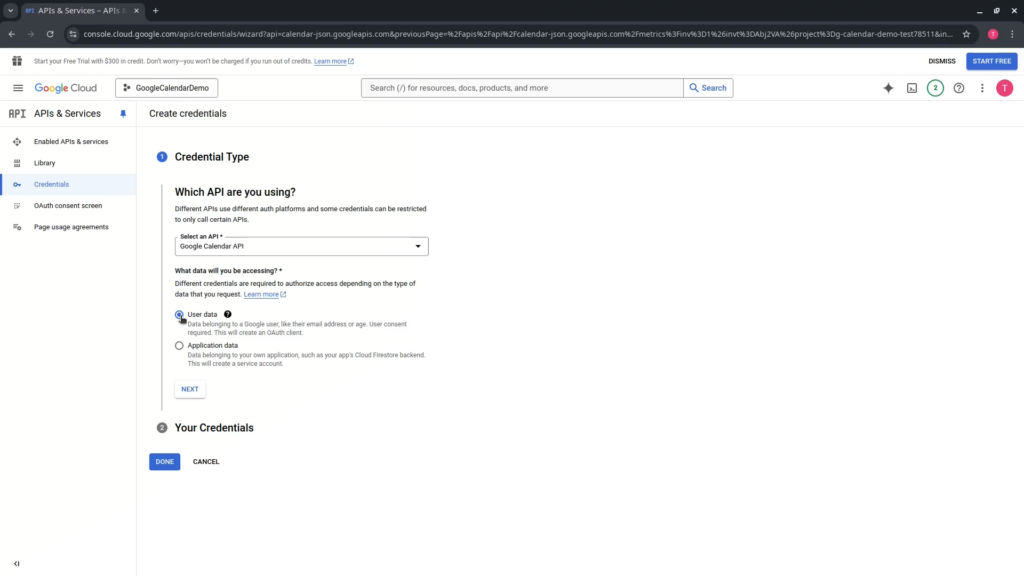
In setting “Which data will you be accessing” select “User data” since we will be creating events which is data belonging to a Google user.
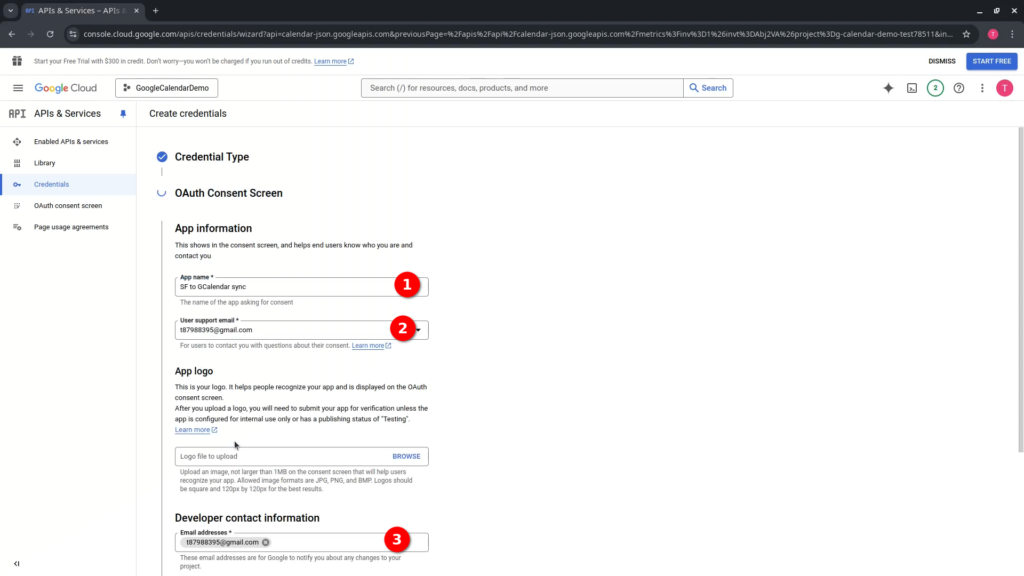
Press “Next” button. During creation of credentials for the first time, Google requires us to setup Consent screen. So, provide basic information like “app name” and “user support email”. Also provide “Developer email” – Google needs it to notify about any changes to the project. Press “Save and continue” button.
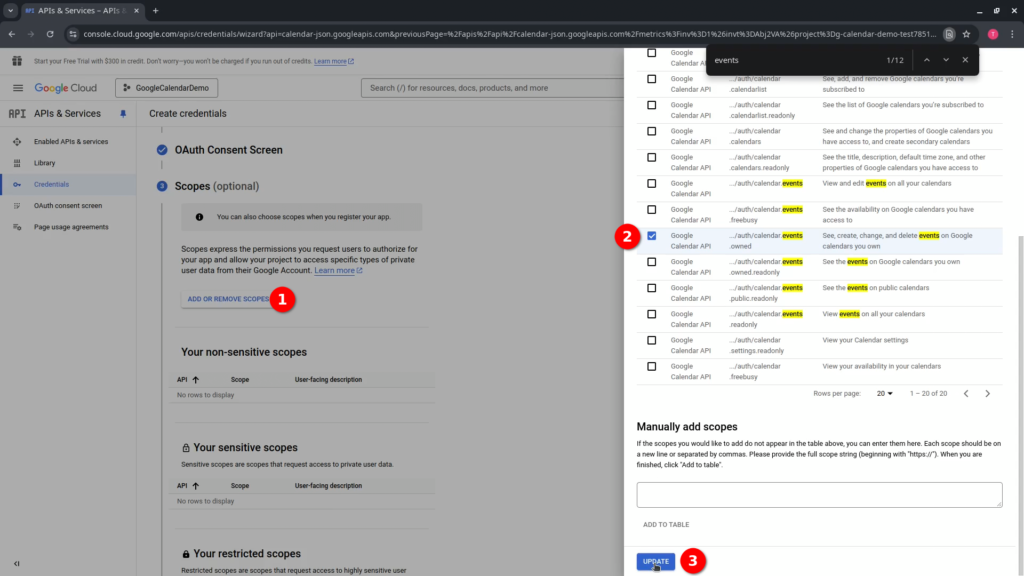
Select required scopes. In our case it is “https://www.googleapis.com/auth/calendar.events.owned”. That means that API will be able to create/read/update and delete Events on calendars which user owns. Press “Update” button.
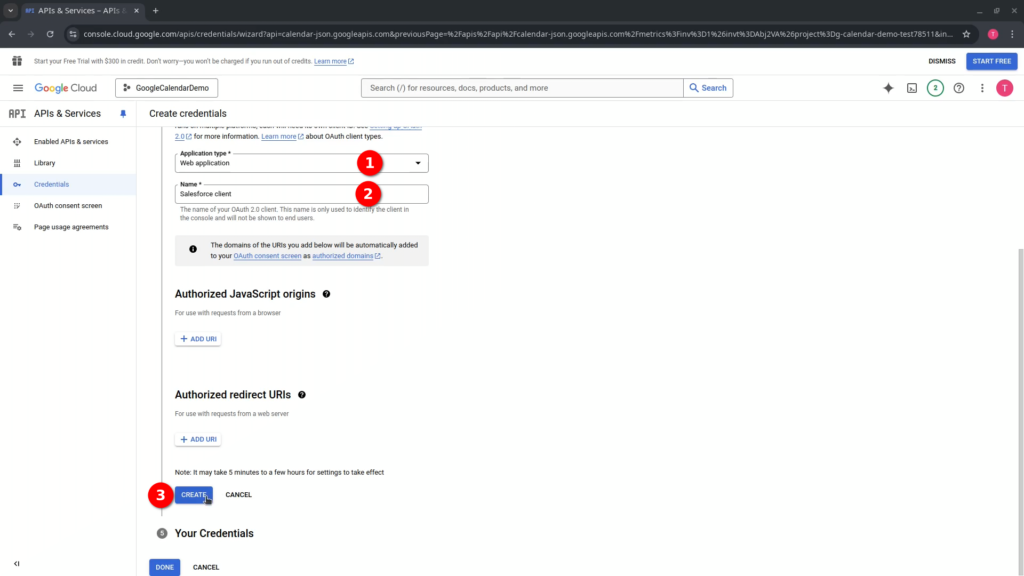
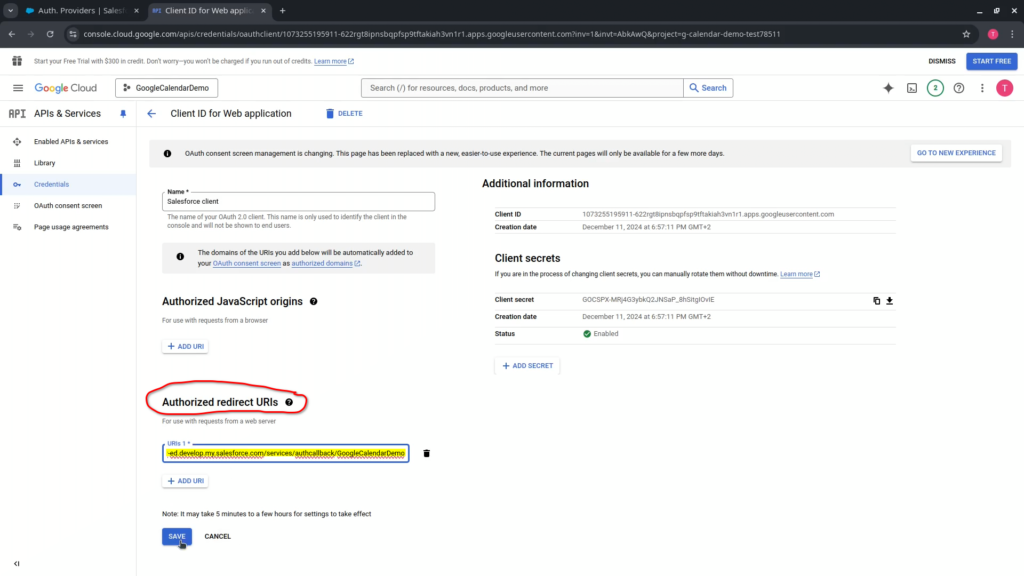
Then press “Save and continue” button. Select Application type as “Web application”. I will call our client as “Salesforce client”. Redirect URL we will provide later since we don’t have it now yet. Press “Create” button.
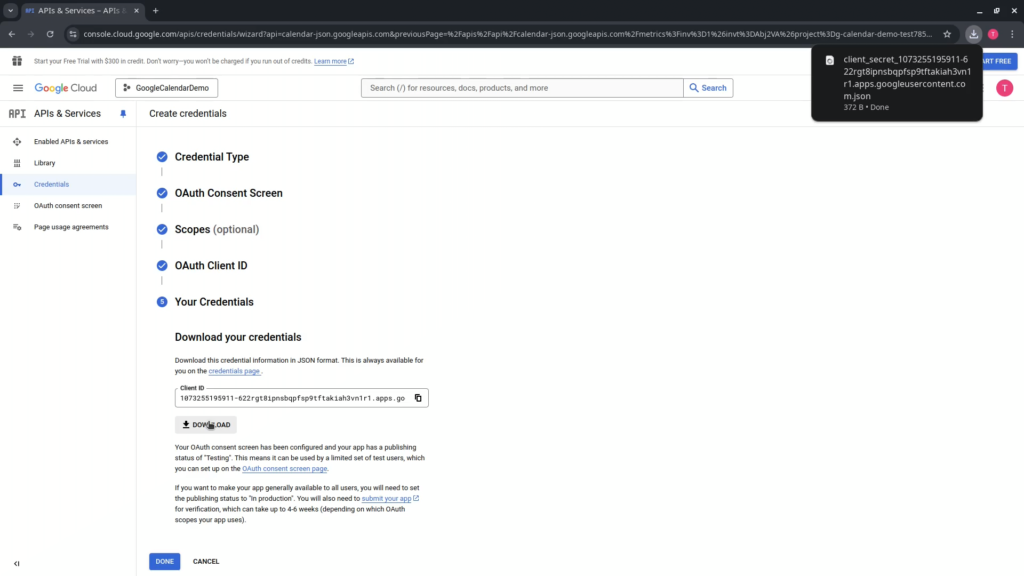
Download JSON file which contains application credentials like: ClientId, ClientSecret and other authentication and authorization data.
{
  "web": {
    "client_id": "1073255195911-gmmfn21krth6eo1rlcndxkbqog4ktamb.apps.googleusercontent.com",
    "project_id": "g-calendar-demo-test75247",
    "auth_uri": "https://accounts.google.com/o/oauth2/auth",
    "token_uri": "https://oauth2.googleapis.com/token",
    "auth_provider_x509_cert_url": "https://www.googleapis.com/oauth2/v1/certs",
    "client_secret": "COGAPX-YNye83SK_4nG1DCoG7CumNKMV5nt"
  }
}
Press done.
Since our application is in “test” mode, only specified test users will have access to it. When application is ready it can be published and after Google review it and approve it – it can be used by any google user. We will not be covering this in our tutorial. So, let’s go to “OAuth consent screen” and add our user for testing. Press “Save” button.
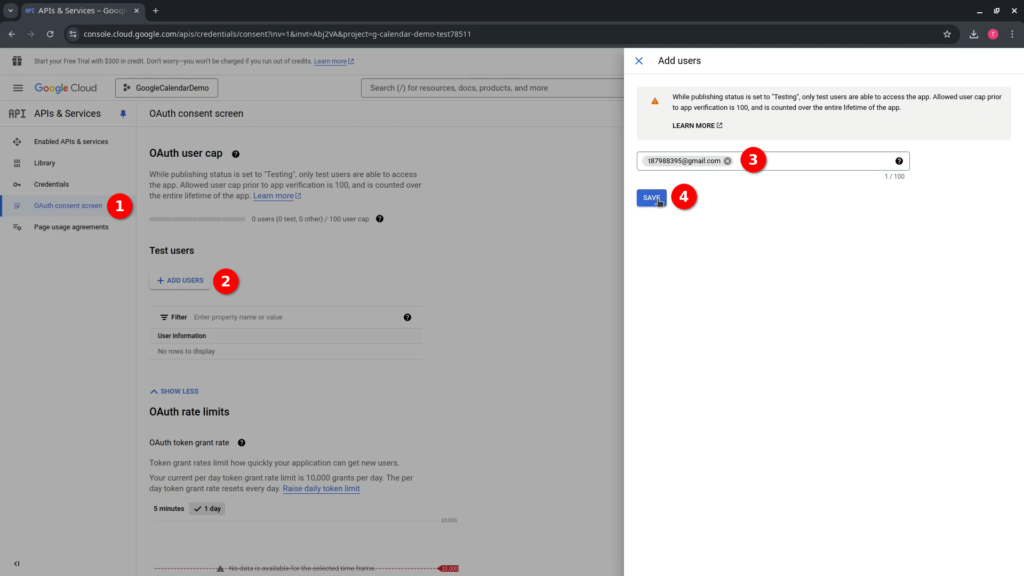
The user is added.
2. Create Salesforce Auth. Provider
We need to create Salesforce Auth. Provider to securely store our authorization data and to be able to authorize Google API via OAuth 2.0 protocol. Go to Setup -> Identity -> Auth. Providers -> press “New” button. As a “Provide type” I will not choose predefined “Google” since it does not allow to store the most recent “Token Endpoin URL” provided by Google.
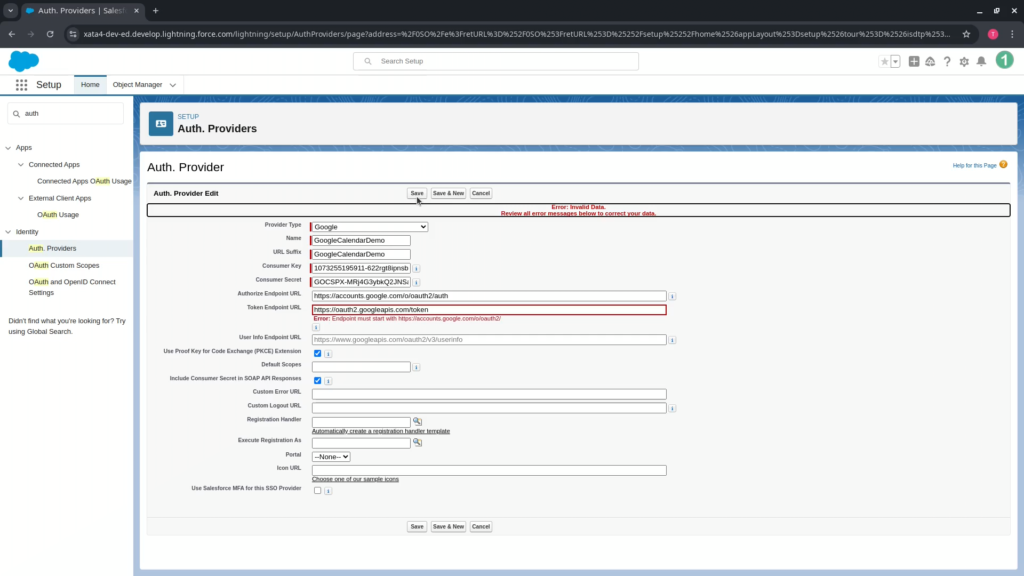
So, I will select generic “Open Id Connect”. Provide “Name” and “URL Suffix”. “Consumer Key”, “Consumer Secret”, “Authorize Endpoint URL” and “Token Endpoint URL” should be taken from ‘JSON file with credentials’ generated by Google. “Authorize Endpoint URL” should be appended with two parameters:
– “access_type” equal to “offline” value – this is to make Google send refresh token along with access token, so that Salesforce could store the refresh token and use it to retrieve new access_token when current access_token is stale.
– “prompt” equal to “consent” value – is used to show consent screen during authorization request even if, previously, user already provided consent. This is useful when scopes are changed to show user which resources application is trying to access.
Deselect “Include Consumer Secret in SOAP API Responses” since we don’t need this option.
Select “Send client credentials in header” to send Client Id and Client Secret in authorization header instead of request body.
Press “Save” button.
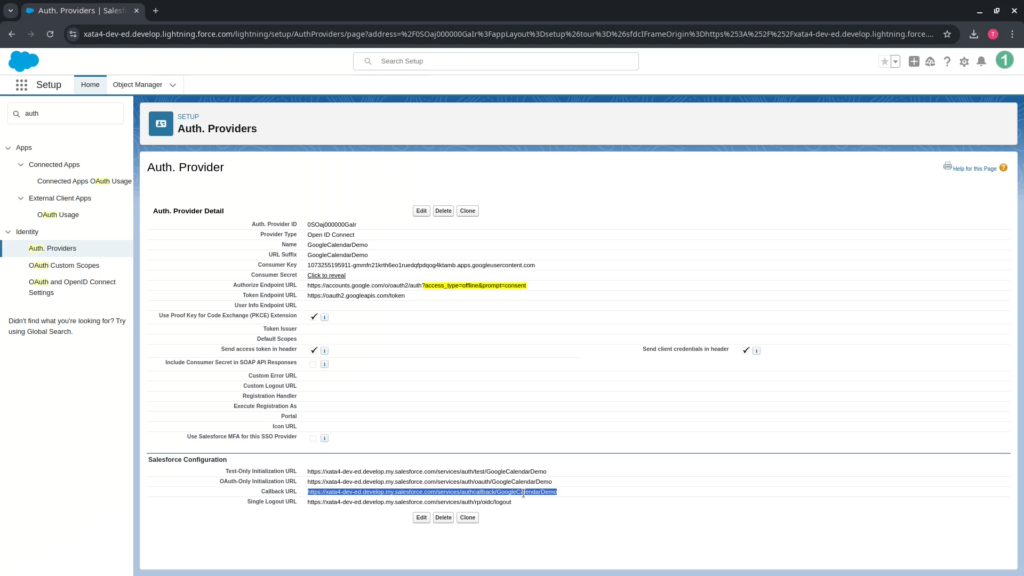
Now, since we already have callback URL, we need to copy it, switch to google cloud console, go to “Enabled API and services”, select “Google Calendar API”, go to “Credentials” tab, open “Salesforce client” credential, under “Authorized redirect URI” press “Add URI” button. Insert callback URL and press save.
3. Create Salesforce External Credential and Named Credential
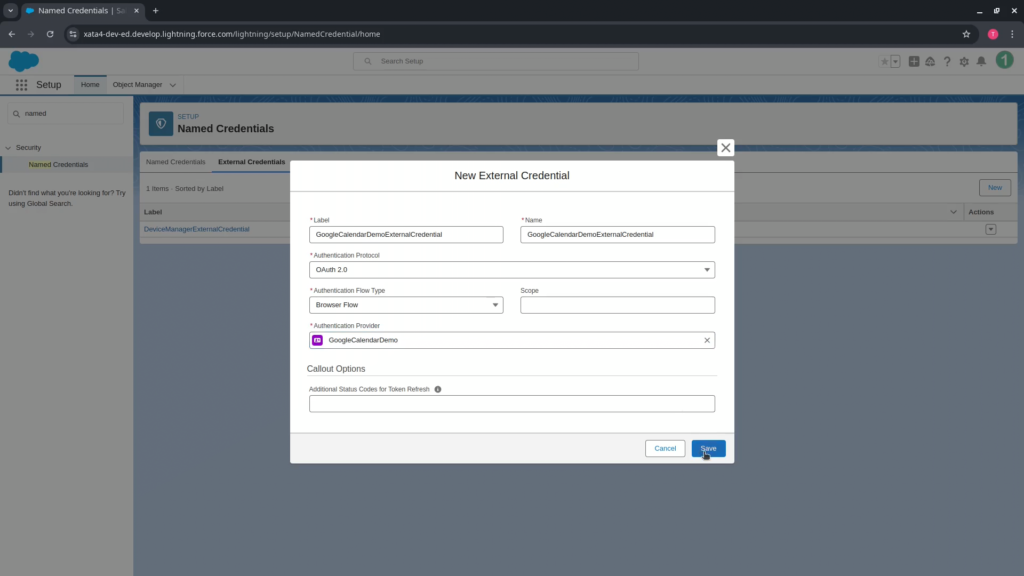
The next step is to create External Credential and Named Credential. So go to Setup -> Security -> Named Credentials -> on External Credential tab, press “New” button. Populate Label and Name. As authentication protocol choose “OAuth 2.0”. “Authentication Flow Type” leave as “Browser flow”. Select “Authentication provider”. Press “Save” button.
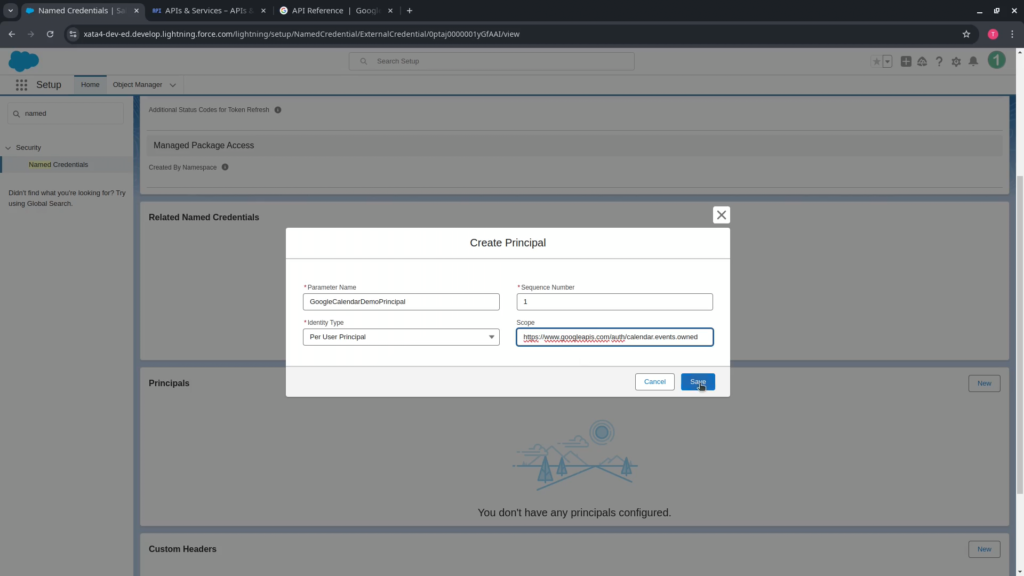
Now we need to create a External Credential Principal. On External Credential page scroll down to Principals section -> press “New” button. Populate Name. Identity type should be “Per User Principal”, so that each user could integrate their own Google Calendar with Salesforce. The next thing is scope. To retrieve correct name of our scope, let’s go to Google Cloud Console -> Enabled API and services -> OAuth consent screen -> press “Edit app” button -> then press “Save and continue” -> in respective scopes section you can find the scope “/auth/calendar.events.owned”. This scope should be prepended with base API URL “https://www.googleapis.com”. So the final value of our scope will be “https://www.googleapis.com/auth/calendar.events.owned”. Press “Save” button.
Go to Named Credentials tab. Press “New” button. Populate Label and Name. Copy base Google API URL and set it up in Named Credential. Select our external credential. Press “Save” button.
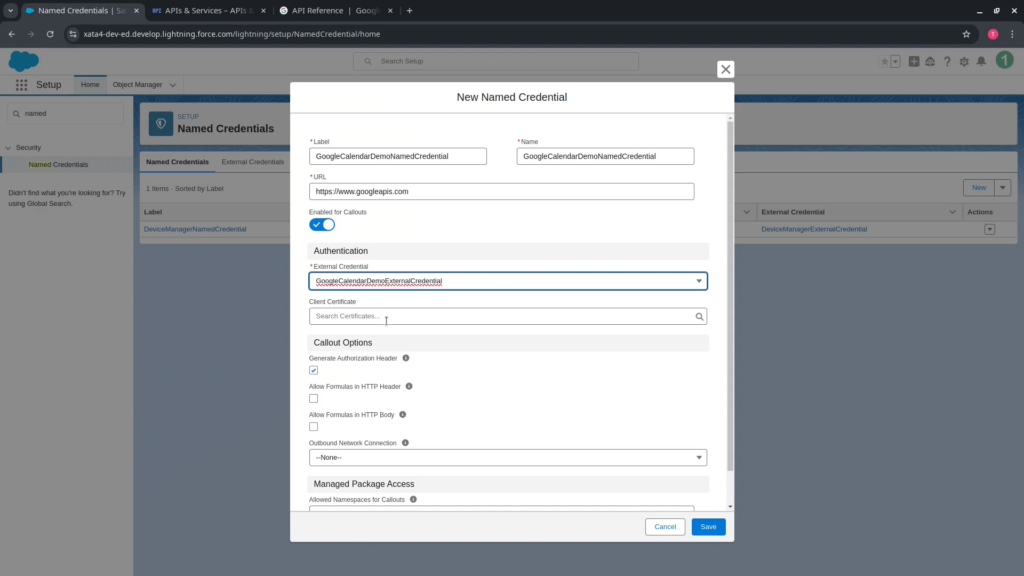
The next step is to authenticate our External Credential. But before we are able to do this, we need to provide user access to External Credential Principal. So, let’s go to Permission Sets settings and create a new Permission Set called “Google calendar demo”. Go to “External Credential Principal Access”. Provide access to our principal. Press “Save” button.
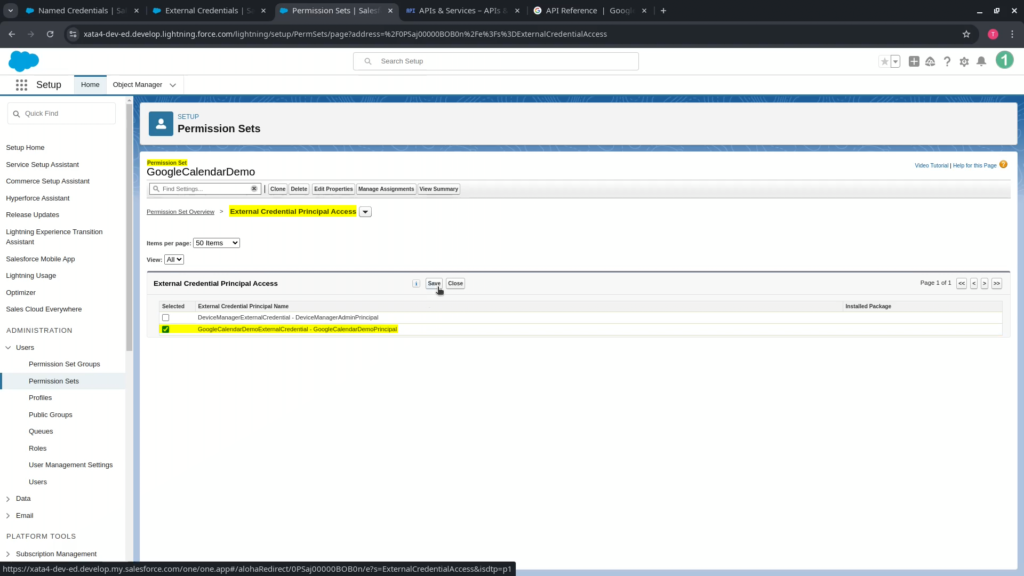
Assign this Permission Set to user.
Go to External Credentials section of User Settings. Press “Allow access” button.
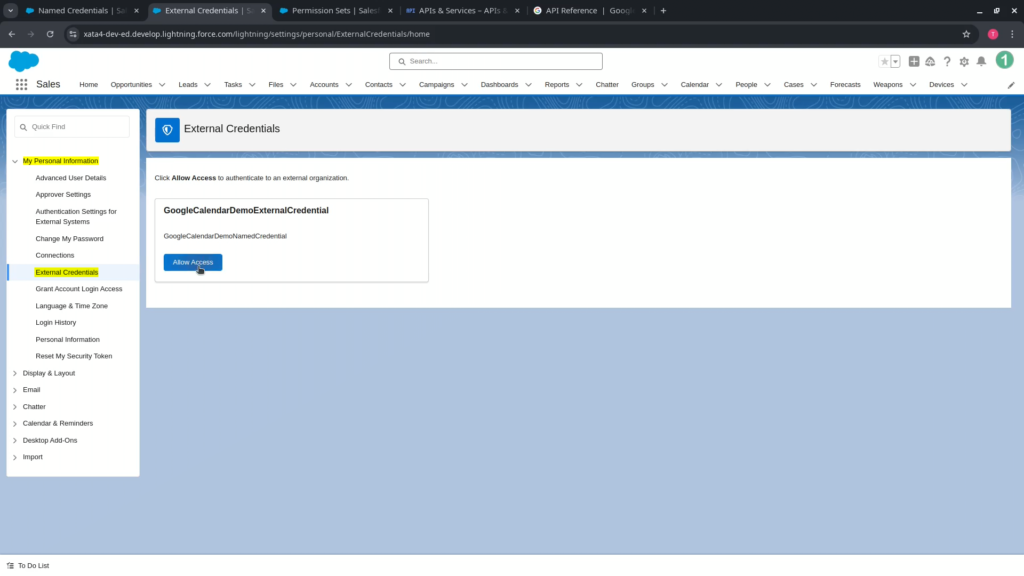
Authentication process has started. Choose your google account.
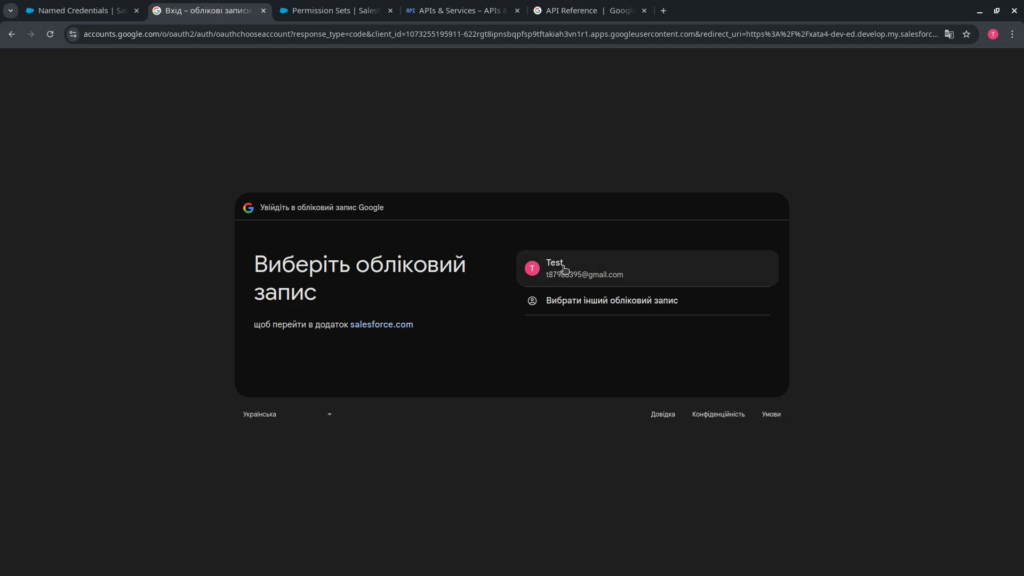
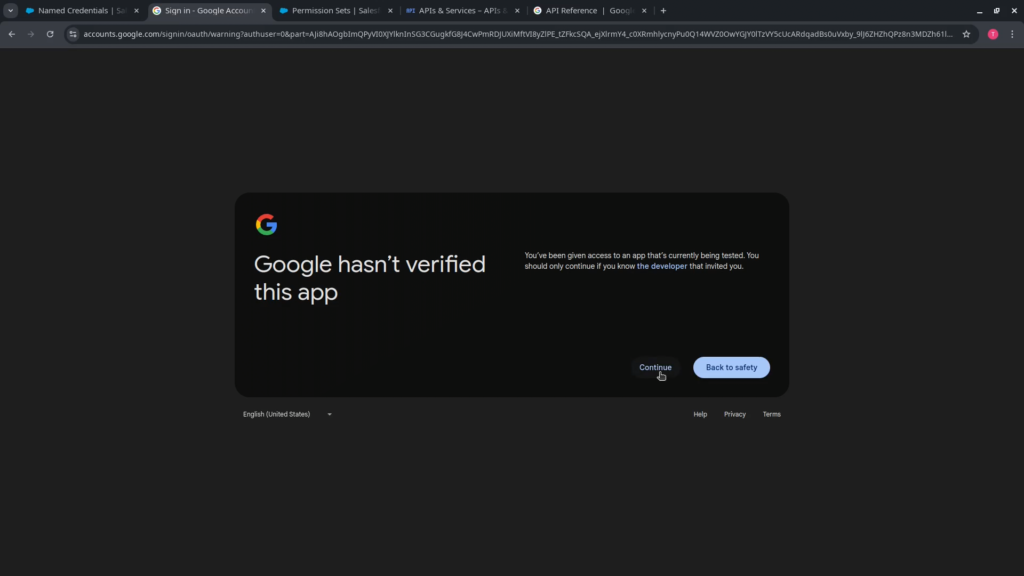
Google warns us that this application is in testing mode. Press “Continue”.
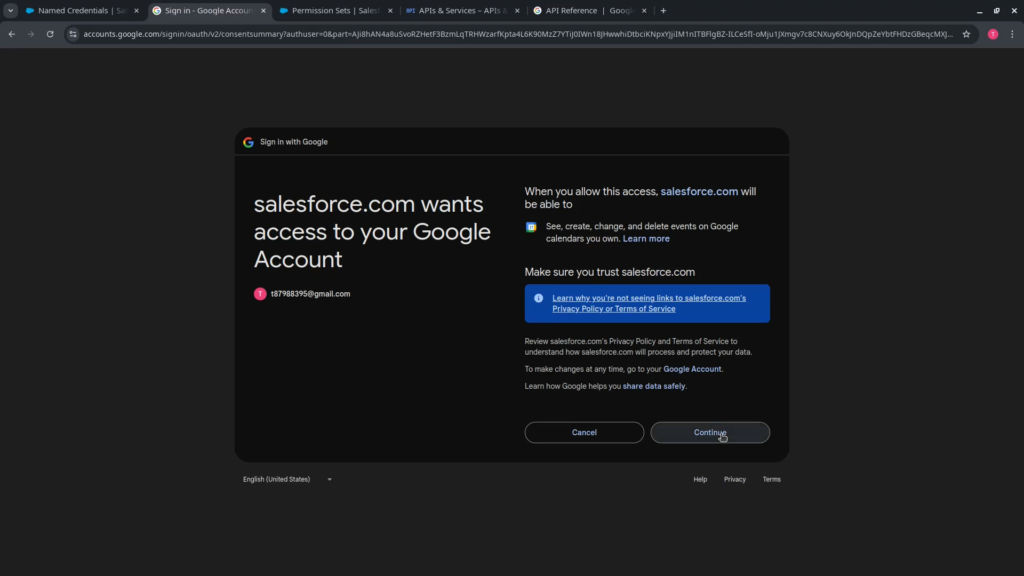
The next is consent screen on which you can see permissions that application requires. Press “Continue”.
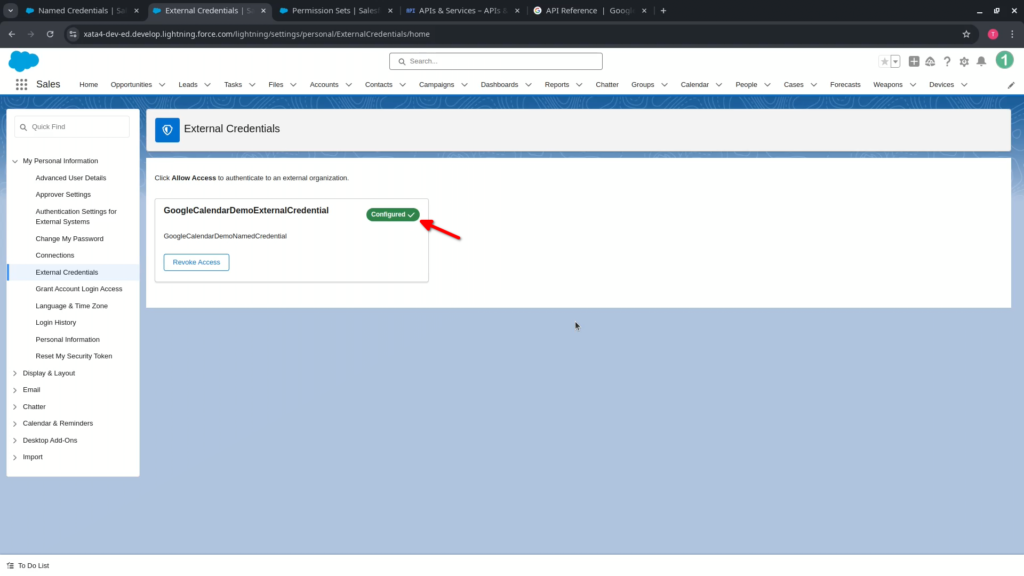
Press “Confirm”. Alright, we can see that authentication is successful.
4. Create Apex Trigger to sync Events from Salesforce to Google Calendar
All the required code consist of:
trigger EventTrigger on Event (after insert) {
    if(Trigger.isAfter){
        if(Trigger.isInsert){
            EventIntegrationService.enqueueEventsForSyncToGCalendar(Trigger.new);
        }
    }
}
public with sharing class EventIntegrationService {
public static void syncToGCalendar(List<Event> newEvents){
for(Event event : newEvents){
HttpRequest req = new HttpRequest();
req.setEndpoint('callout:GoogleCalendarDemoNamedCredential/calendar/v3/calendars/primary/events');
req.setMethod('POST');
req.setHeader('Content-Type', 'application/json');
String requestBody = serializeEvent(event);
req.setBody(requestBody);
new Http().send(req);
}
}
private static String serializeEvent(Event e){
Map<String, Object> jsonMap = new Map<String, Object>();
jsonMap.put('summary', e.Subject);
jsonMap.put('description', e.Description);
Map<String, Object> startMap = new Map<String, Object>();
Map<String, Object> endMap = new Map<String, Object>();
if(e.IsAllDayEvent == TRUE){
startMap.put('date', e.StartDateTime.date());
endMap.put('date', e.StartDateTime.date().addDays(1));
} else {
startMap.put('dateTime', e.StartDateTime);
startMap.put('timeZone', UserInfo.getTimeZone().getID());
endMap.put('dateTime', e.EndDateTime);
endMap.put('timeZone', UserInfo.getTimeZone().getID());
}
jsonMap.put('start', startMap);
jsonMap.put('end', endMap);
return JSON.serialize(jsonMap);
}
public static void enqueueEventsForSyncToGCalendar(List<Event> newEvents){
System.enqueueJob(
new EventIntegrationQueueable(
new Map<Id, Event>(newEvents).keySet()
)
);
}
}public with sharing class EventIntegrationQueueable implements Queueable, Database.AllowsCallouts {
private Set<Id> eventsIds;
public EventIntegrationQueueable(Set<Id> eventsIds) {
this.eventsIds = eventsIds;
}
public void execute(QueueableContext context) {
List<Event> events = [
SELECT Subject, Description, IsAllDayEvent, StartDateTime, EndDateTime
FROM Event
WHERE Id IN :eventsIds
];
EventIntegrationService.syncToGCalendar(events);
}
}So, on after insert of Event record, the trigger is calling “enqueueEvents|ForSyncToGCalendar” method from “EventIntegrationService” class. This method retrieves Events ids, passes them to the new instance of “EventIntegrationQueueable” and enqueues the job. “EventIntegrationQueueable” job retrieves Event records with all the needed fields and passes these Events to “syncToGCalendar” method of “EventIntegrationService” class. This method iterates over each Event record and sends it to Google Calendar API. So, we are creating new “HttpRequest”, providing it with NamedCredential and Events endpoint. This endpoint you can find in Google API reference. In Events section select “insert” operation. To insert Event we should perform “POST” request to this URL: calendar/v3/calendars/calendarId/events. Instead of specific “calendarId” we have used “primary” keyword – in such a case Google will user primary user’s calendar. We are specifying “POST” method. Setting content type as JSON. Serializing Even record data. Adding body to request. Sending request for execution.

Leave a Reply