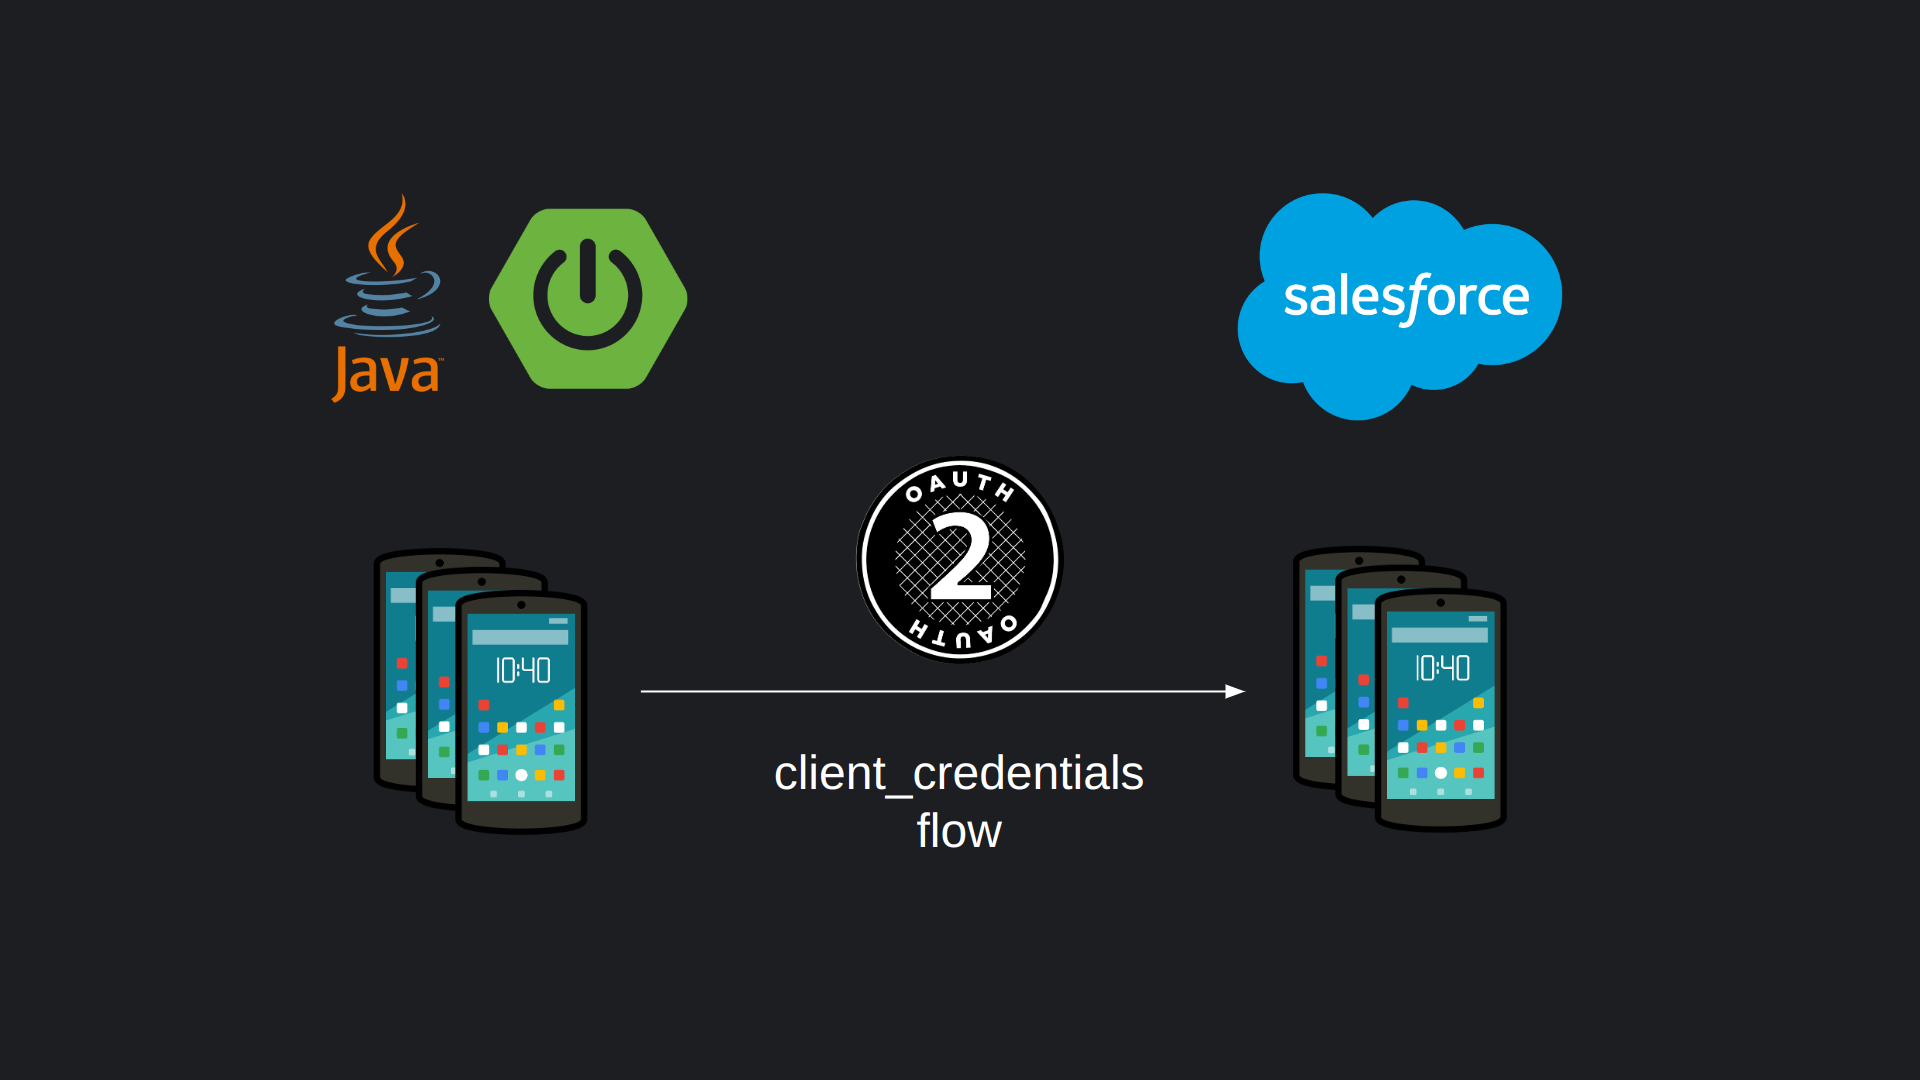
In this tutorial I’m gonna show you how to integrate Java Spring Boot application with Salesforce. We are going to do call-outs from Java to Salesforce via OAuth 2.0 protocol. In this case we will use client_credentials flow which is ideal for Service-to-Service communication with no user involved.
This article is based on simple Spring Boot application which I created beforehand. GitHub reference: https://github.com/volodymyrbervetskyy/sf_java_integration.
If you prefer videos over articles, you can check for the same tutorial on my YouTube channel: https://www.youtube.com/watch?v=kGVefpibsKU
Here is the quick demo that explains of what app can do before we add integration with Salesforce:
1. Create Salesforce external client app
To securely access Salesforce resources from external system we need to create an application that will provide us with OAuth 2.0 features. For this purpose we need to go to Setup and search for App Manager. Press on “New Connected App” button

Salesforce provides two types of OAuth 2.0 applications, these are: Connected App and External Client App. In general they serve the same goal, but as usual they have differences. External Client Apps is a next generation of Connected Apps. They are more oriented for 2nd generation packaging. You can find the full list of differences in Salesforce documentation and choose the right one depending on your purpose. In my case both of them are applicable. I will choose External Client App.
In order to create External Client App we need to provide basic information, that is:
– External Client App Name – a label.
– API Name
– Contact Email
– Distribution State – defines whether app will be packageable. In our case we don’t create package, so we leave the value “Local”.

Expand “API (Enable OAuth Settings)” section. Turn on “Enable OAuth” checkbox. Since we will be using client credentials flow, we don’t need Callback URL. But as Salesforce requires it, we will set a dummy value “https://localhost”. OAuth Scopes define what our client (in our case Java Spring Boot application) can do in Salesforce. If you would like to look through all the scopes, you can check OAuth Tokens and Scopes Salesforce documentation. For our purpose it is enough to select “Manage user data via APIs (api)” scope. In “Flow Enablement” section select “Enable Client Credentials Flow”. Press “Create” button.
2. Create integration user
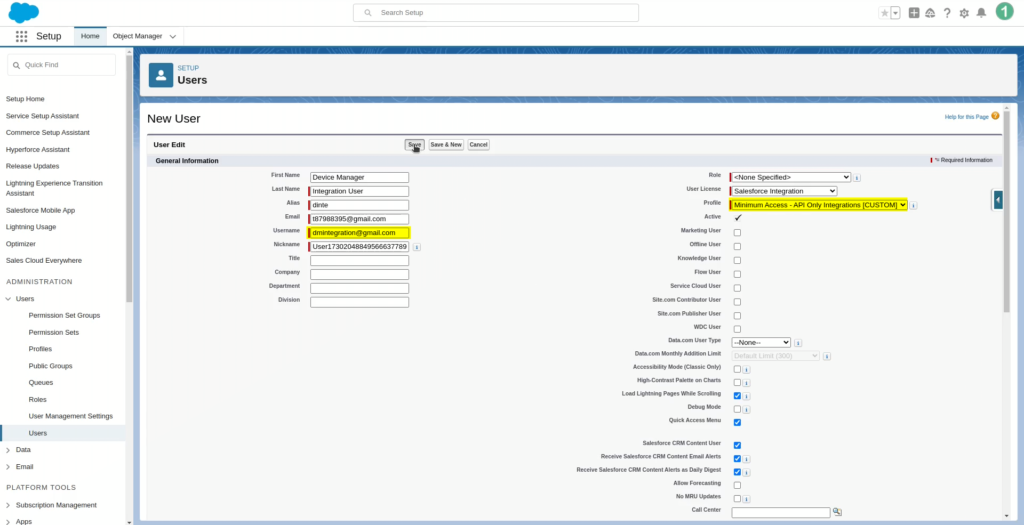
When creating users remember about rule of least privileges. Each user should have the minimum access required for his job. If multiple external systems need to have access to your Salesforce org, as a best practice, create separate integration user for each integration. In our case we will clone “Minimum Access – API Only Integrations” profile. Go to Setup -> Users -> Profiles, search for “Minimum Access – API Only Integrations” profile and clone it.

This profile is designed specifically for integration purposes, it provides the least privileges required to interact with Salesforce via API. If you are using any other Salesforce profile, as a best practice, make sure that “Api Only User” permission is enabled – it will allow accessing Salesforce only thought API but not through UI. Also make sure that “API Enabled” permission is granted – without it you will will just not have access to Salesforce API.

On profile page go to Object Settings and provide access to objects and fields as you need.

Depending on your security considerations you can setup other settings like “Login IP Ranges”, “Session Setting” etc.
Let’s create integration user, populate all the required fields, remember the username since we will need it in next step, choose user license and profile.

Now we need to go back to External Client App, press “edit” button in Policies tab, scroll down to OAuth Policies, select “Enable Client Credentials Flow” and specify username of our integration user in “Run As” field.

In such a way External Client App will know under which user it should perform integration actions.
3. Register OAuth2 client in Java
First of all we need make sure that we have “spring-boot-starter-security” dependency in our pom.xml file. This dependency provides core security features and the necessary infrastructure on which Java OAuth2 builds. Also we need to add “spring-boot-starter-oauth2-client” dependency which provides OAuth2 client functionalities.
...
<dependency>
	<groupId>org.springframework.boot</groupId>
	<artifactId>spring-boot-starter-security</artifactId>
</dependency>
<dependency>
	<groupId>org.springframework.boot</groupId>
	<artifactId>spring-boot-starter-oauth2-client</artifactId>
</dependency>
...
Secondly, in “application” file we need to register our OAuth client.
spring:
  security:
    oauth2:
      client:
        registration:
          sf:
            client-id: ${SF_CLIENT_ID}
            client-secret: ${SF_CLIENT_SECRET}
            authorization-grant-type: client_credentials
        provider:
          sf:
            token-uri: "${SF_BASE_URL}${SF_TOKEN_URI}"
Here we have 2 sections: “registration” where we provide credentials to Salesforce External client app, that is client-id and client-secret, and also we specify here type of authorization which is client_credentials. In the “provider” section we should specify Salesforce OAuth2 token endpoint. Pay attention that registration and provider should have the same name, in my case it is “sf”, you can call it whatever you want. One more thing that I want to mention is that in client_credentials flow Salesforce does not support “scope” parameter for token request. So, all the rights are set up on the level of External Client App.
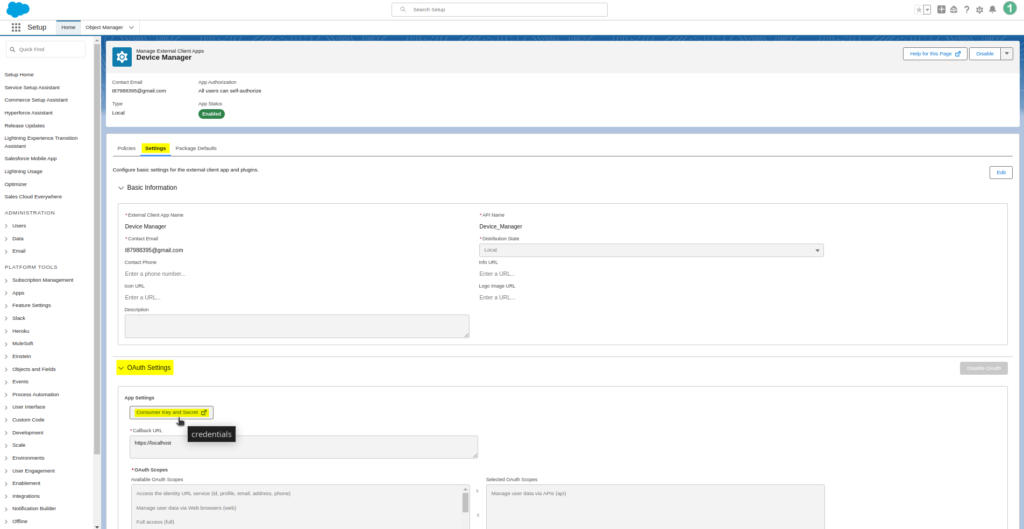
As you have noticed, I haven’t specified sensitive information, like, credentials directly in “application” file. Since, I will commit my code to GitHub and I don’t want anyone to know my credentials. Instead I have used variables here. So, let’s setup their values. To retrieve client-id and client-secret we need to go to our External Client app -> Settings tab -> expand “OAuth Settings” section and press on “Consumer Key and Secret” button.


Copy these values, go to IDE -> edit run configurations -> in “Environment variables” section setup SF_CLIENT_ID and SF_CLIENT_SECRET variables. Also we need to setup SF_BASE_URL, so let’s go to Setup -> “My Domain” and copy “My Domain URL”, set it up in IDE environment variables.

Value of SF_TOKEN_URI can be found in OAuth Endpoints Salesforce documentation.

4. Setup WebClient to make requests to Salesforce.
We need to have some tools to perform callouts to Salesforce. I will choose WebClient since it integrates seamlessly with Spring Security OAuth2 mechanisms. It automatically handles token retrieval, refreshing tokens, and applies OAuth token in the Authorization header without additional configuration.
To utilize WebClient, “spring-boot-starter-webflux” dependency should be added.
...
<dependency>
	<groupId>org.springframework.boot</groupId>
	<artifactId>spring-boot-starter-webflux</artifactId>
</dependency>
...
We need to configure WebClient to automatically include OAuth2 authorization for HTTP requests. For this purpose, let’s create WebClientConfig class and define here WebClient bean.
@Configuration
public class WebClientConfig {

    @Bean
    WebClient webClient(OAuth2AuthorizedClientManager authorizedClientManager) {
        ServletOAuth2AuthorizedClientExchangeFilterFunction oauth2Client =
            new ServletOAuth2AuthorizedClientExchangeFilterFunction(authorizedClientManager);
        return WebClient.builder()
            .apply(oauth2Client.oauth2Configuration())
            .build();
    }
}
In the parameters we have, injected AuthorizedClientManager – which manages all the registered in our Spring Boot app OAuth2 clients and their tokens. It is responsible for retrieving, caching, and refreshing OAuth tokens. Then we are creating AuthorizedClientExchangeFilterFunction with passing authorizedClientManager in constructor. This ExchangeFilterFunction is responsible for adding Authorization headers to HTTP requests. In the end we are applying OAuth2 configuration to the WebClient. Now we can utilize WebClient in service.
Let’s create SfIntegrationService. It will be responsible for integration with Salesforce overall.
@Service
public class SfIntegrationService {

    private final String sfOAuth2ClientRegistrationId = "sf";

    @Value("${SF_BASE_URL}")
    private String baseUrl;

    private final WebClient webClient;

    @Autowired
    public SfIntegrationService(WebClient webClient){
        this.webClient = webClient;
    }

    public ResponseEntity<String> upsertRecord(String objectName, String externalIdFieldName, String externalIdValue, String body){
        ResponseEntity<String> response = webClient
            .patch()
            .uri(baseUrl + "/services/data/v58.0/sobjects/{0}/{1}/{2}", objectName, externalIdFieldName, externalIdValue)
            .attributes(clientRegistrationId(sfOAuth2ClientRegistrationId))
            .contentType(MediaType.APPLICATION_JSON)
            .bodyValue(body)
            .retrieve()
            .toEntity(String.class)
            .block();

        if(!response.getStatusCode().is2xxSuccessful()){
            System.out.println("status code: " + response.getStatusCode().toString());
            System.out.println("response: " + response.toString());
            throw new RuntimeException("Error during executing request.");
        }

        return response;
    }
}
So here we have defined name of OAuth client registration from application file [line 4], base URL of Salesforce org [line 7 ], instance of “webClient” which is auto-wired in constructor [lines 9-14]. “upsertRecord” method is creating or updating records on Salesforce organization. In the parameters we pass:
– Name of Salesforce object
– External Id field – via this field we will be doing upsert on Salesforce
– Value of external Id
– Body
We utilize “webClient” to make “PATCH” request to Salesforce SObjects REST API. To make upsert we need to provide name of the object, name of the External Id field and value of External Id in URL. Then we are telling “webClient” to use registered “sf” OAuth client for authentication. We are sending our body in JSON format. Passing body to request. Executing request. Getting response in “String” format and blocking the execution to wait until the response is sent back. Handling unsuccessful requests. And returning the response.
Let’s create DeviceSfIntegrationService. It will be responsible for synchronizing Device records only.
@Service
public class DeviceSfIntegrationService {

    private final static String DEVICE_SOBJECT = "Device__c";
    private final static String DEVICE_SOBJECT_EXTERNAL_ID = "ExternalDeviceManagerAppId__c";

    private final SfIntegrationService sfIntegrationService;

    @Autowired
    public DeviceSfIntegrationService(SfIntegrationService sfIntegrationService){
        this.sfIntegrationService = sfIntegrationService;
    }

    public void upsertDevice(Device device) {
        String requestBody = createRequestBody(device);
        ResponseEntity<String> response = sfIntegrationService.upsertRecord(
            DEVICE_SOBJECT,
            DEVICE_SOBJECT_EXTERNAL_ID,
            device.getId().toString(),
            requestBody
        );
    }

    private String createRequestBody(Device device) {
        Map<String, Object> bodyDataMap = new HashMap<>();
        bodyDataMap.put("Name", device.getModel());
        bodyDataMap.put("Manufacturer__c", device.getManufacturer());
        bodyDataMap.put("Price__c", device.getPrice());
        bodyDataMap.put("LastlyModifiedByDMJavaApp__c", true);

        String requestBody;
        try {
            requestBody = new ObjectMapper().writeValueAsString(bodyDataMap);
        } catch (JsonProcessingException jsonProcessingException){
            jsonProcessingException.printStackTrace();
            throw new RuntimeException("Error during creation of request body. Please contact the administrator.");
        }

        return requestBody;
    }

}
Here we have the name of the Device sobject [line 4], external id field name [line 5], sfIntegrationService autowired in constructor [lines 7-12]. Method “upsertDevice” takes in Device record, prepares body and sends Device data for upsert request to “sfIntegrationService”.
Now we can go to DeviceService class and inject there “DeviceSfIntegrationService” to be used in “saveDevice” method. So that every time Device is saved on Java side – the changes are synchronized to the Salesforce org.
@Service
public class DeviceService {

    @Autowired
    private DeviceRepository deviceRepository;

    @Autowired
    private DeviceSfIntegrationService deviceSfIntegrationService;

    public List<Device> getAllDevices(){
        return deviceRepository.findAll();
    }

    public Device getDeviceById(String id){
        return deviceRepository.getReferenceById(id);
    }

    @Transactional
    public Device saveDevice(Device device){
        Device savedDevice = deviceRepository.save(device);
        deviceSfIntegrationService.upsertDevice(savedDevice);
        return savedDevice;
    }
}
5. Demo
Here is the demo video that shows the results we’ve achieved:

Leave a Reply